Install LNMP Stack on Red Hat-Based System
LEMP is an open-source web application stack used to develop web applications. This is a comprehensive tutorial of how to install LNMP stack on Red Hat-based linux distribution.
The acronym LNMP stands for Linux, Nginx, MySQL/MariaDB, and PHP A LNMP stack is a group of open source software (Nginx, MySQL/MariaDB, and PHP) running on a Linux system to implement a web server.
This tutorial is applicable to all Red Hat-based systems (Red Hat, CentOS, Fedora, Alma Linux, and Rocky Linux, etc.).
Nginx
Installation
If you are using CentOS, please ensure that the EPEL repository has been added to the system. If not, you can add it using the following commands:
|
|
Use yum or dnf to install Nginx
|
|
Use the systemctl command to start a service (which is generally started automatically).
|
|
The systemctl command does not automatically return the status of a service after starting it. You can use systemctl status nginx to view the current running status of the nginx service.
|
|
systemctl status <UNIT> can be used to check the current running status of a service and output a brief log record. More detailed logs can be viewed using journalctl. For example:
|
|
It will print all nginx running logs.
ststemctl command
|
|
Firewall Configurations
To allow access to web services, you need to allow traffic on the HTTP and HTTPS ports. This can be done by configuring the system firewall with the following commands.
|
|
For security purposes, it is recommended to enable the system firewall. If the firewall was not previously enabled and you are currently using SSH to connect to the server, make sure that the SSH service port is not blocked by the firewall before enabling it, otherwise your connection may be interrupted.
Use the following command to check if the service ports have been pre-defined (for example, http, https, mysql).
|
|
If the ssh service is defined, use the following command to allow traffic of ssh.
|
|
If the ssh is not defined, use the following command to allow traffic for a specific port (for example, port 22, which is the default port for ssh).
|
|
Now, enter the server’s IP or domain name in a web browser, you will see the following page, witch indicating that Nginx has been successfully installed and configured.

Note: This page may diverse in different Linux distributions.
MySQL/MariaDB
Installation
MariaDB is fully compatible with MySQL and also provides some additional features, while having a certain performance improvement compared to MySQL. Their command line interfaces are almost identical. Install one according to your needs.
|
|
After installation, start the MySQL service (which is generally started automatically).
|
|
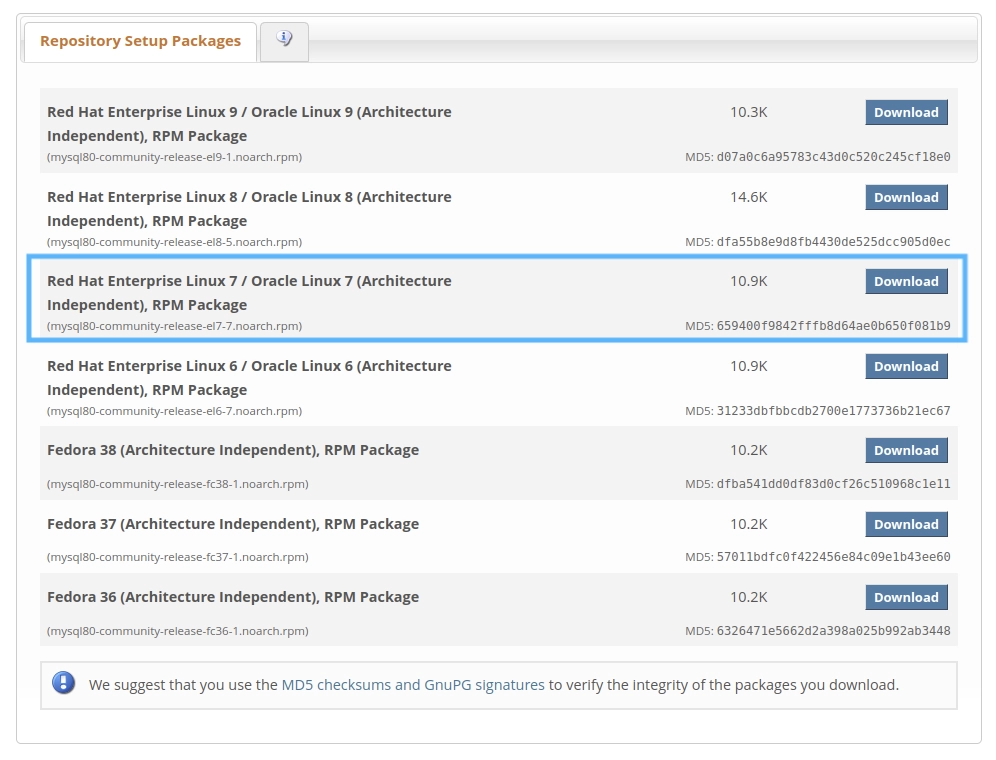
Some distributions do not include MySQL in repositories, but they probably include MariaDB. If you are insist to install MySQL, you need to first go to the MySQL Yum Repository to find the repository that corresponds to your distribution, download and install it.
For example, CentOS 7 should install this package.
|
|
Configuration
For a newly installed MySQL, it is recommended to run the security configuration script mysql_secure_installation provided by the DBMS (Database Management System) to perform basic security settings. (This script will help change some default configurations which may have security risks, eg. remote root login.)
As of July 2022, new installation of MySQL requires some configuration before running the mysql_secure_installation script, otherwise it will get stuck in a endless loop of attempting to set the root user password. This is because the root user does not connect a password by default and there is currently no password authentication enabled.
To avoid this issue, you need to set a password for the root user before performing security option configuration.
|
|
Enter exit to exit the MySQL prompt, and now you can proceed.
Run mysql_secure_installation to perform security configurations based on prompts.
|
|
- VALIDATE PASSWORD COMPONENT -
Y - Level of password validation policy -
2(STRONG) - Remove anonymous users? -
Y - Disallow root login remotely? -
Y - Remove test database and access to it? -
Y - Reload privilege tables now? -
Y
PHP
Use yum or dnf to install the relevant package directly.
|
|
If the PHP related packages are not available in the system repository, you can configure them using the following command.
|
|
Start the PHP-FPM service (which is generally started automatically):
|
|
 Alipay
 PayPal
 WeChat Pay
